


Knowing how to make text vertical in Google Sheets is useful if you want to change the rotation of the given string or text values.
Meaning, sometimes, we may need to make our text appear vertical, instead of the default orientation, which is horizontal.
Table of Contents
In this article, we will be discussing the 3 useful options of making text vertical in Google Sheets:
- Stack Vertically
- Rotate Up
- Rotate Down
The rules for making text vertical in Google Sheets are as follows:
- While the options in this article are also applicable for non-text values, they are preferably useful for text values.
- If you have very minimal text in a cell, the Stack Vertically option is preferable. Otherwise, the Rotate Up or Rotate Down can be used.
Let’s take an example.
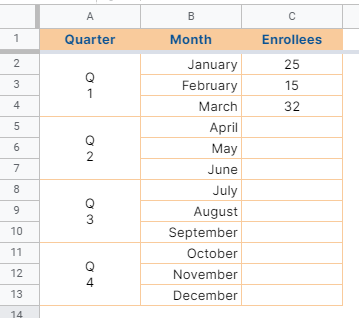
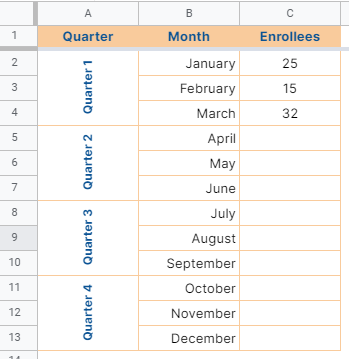
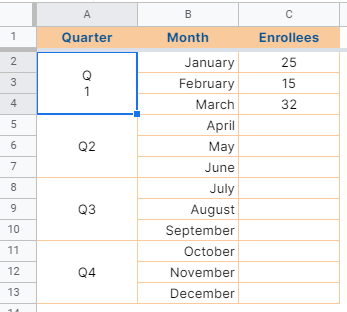
Eric, a data analyst at a technical school, is preparing a report of the number of enrollees in quarter 1. Below is his raw data:

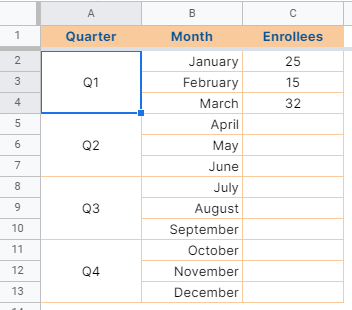
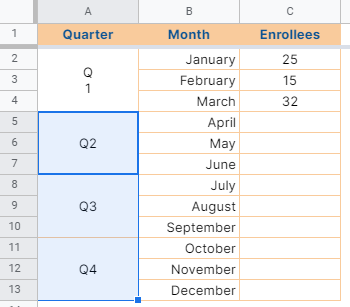
While the table seems good enough, Eric would still like to apply a few tweaks to make it more appealing. He merged rows and applied the Stack vertically feature in column A. See his formatted table below:
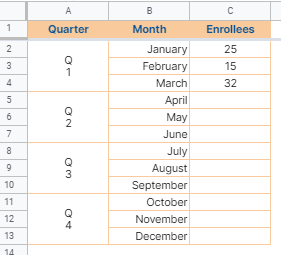
He first merged every 3 rows from rows 2 to 13. After that, he changed the text rotation to Stack vertically. Finally, he changed the vertical alignment to the middle.
Looks good, right?
Let’s have more examples!
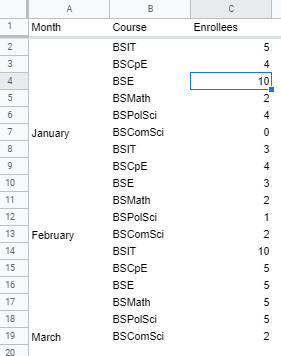
On a different tab of the same worksheet, Eric has the data for the number of enrollees by course every month of the first quarter. See his raw table below:
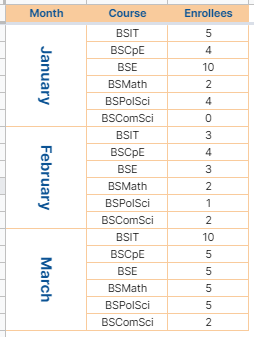
Eric applied formatting to his raw table and was able to come up with the table below:

He used the Rotate up option under the Text rotation feature in Google Sheets. Alternatively, Eric can use the Rotate down option instead, like in the example table below:
The Stack vertically option is rarely used and applies to a scenario wherein you have very minimal text, just like our example in the first table above.
Abbreviated texts and acronyms are text labels to which the Stack vertically option can be applied to.
As for the Rotate up and Rotate down options, these are the commonly used text rotations for proper strings since some people find the texts applied with the Stack vertically option difficult to read.
Watch out for a more advanced tutorial and examples on how you make text vertical in the coming weeks. Be sure to subscribe to be notified.
Awesome! Let’s begin getting to know more about the process and steps in making text vertical in Google Sheets.
The Anatomy of Stack Vertically, Rotate Up and Rotate Down Features in Making Text Vertical
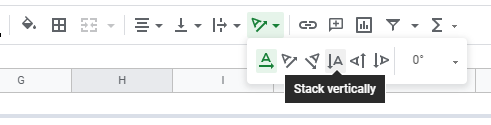
The toolbar holds most of the commonly used features and functionality in Google Sheets. This is where we can find the text rotate options.
Stack Vertically
Rotate up
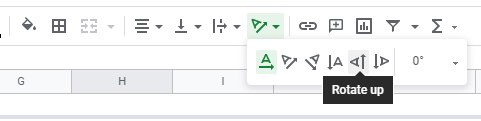
Rotate down
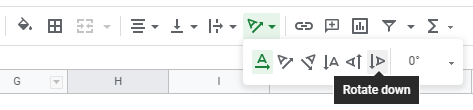
Alternatively, you may find these options in the Format menu > Text Rotation.

Using these easy-access menus and buttons in Google Sheet toolbar, you should be able to make text vertical conveniently.
A Real Example of Making Text Vertical
Take a look at our first example table below to see how to make text vertical in Google Sheets:
In the example above, we used the Stack vertically option to make every alphabet in each quarter label placed right below the above one.
Notice that even if Eric did such formatting, we can still clearly read the label. This kind of scenario is where the Stack vertically option is preferable.
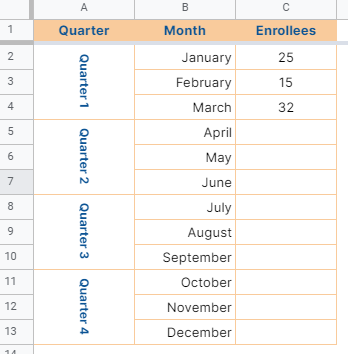
If it were some proper texts, like the ‘Quarter 1’, ‘Quarter 2’, etc., some people may find it hard to read. See sample below:
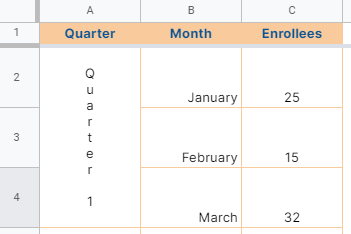
This is where either the Rotate up or Rotate down option will come in handy. See our sample tables below:
Unlike the Stack vertically option, the alphabets in the table above are not stacked with each other.
The feature simply rotates the texts 90 degrees to make them appear in the vertical orientation. The texts start from the bottom and go to the top.
What if you want the texts to start from top to bottom?
In that case, you can use the Rotate down option. See the sample table below:
Like our texts in the table above, the Rotate down option simply changes the direction to -90 degrees. That’s almost similar to the Rotate up option, except the texts start from top to bottom.
As long as these options don’t confuse the reader, you may use either of them as you see fit in your file.
You may make a copy of the spreadsheet using the link I have attached below.
How to Make Text Vertical in Google Sheets
- Simply click the cells where you want to make the text vertical. In this case, I will be using the merged cells A2:A4.
- Now, in the toolbar, click on the Text rotation icon.
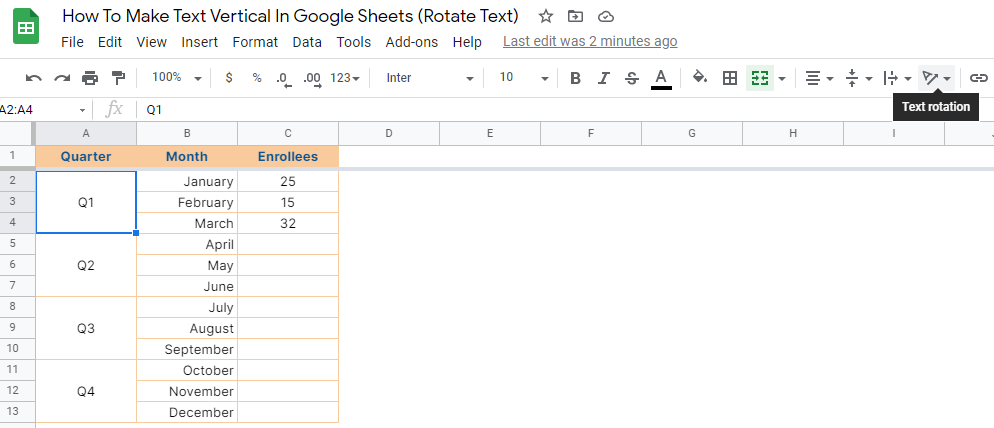
- Finally, click on the Stack vertically option.

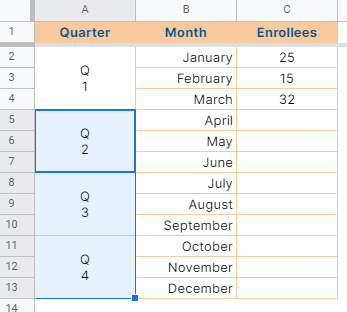
- The alphabets of text in the merged cells A2:A4 now appear stacked vertically.
- Repeat steps 1-3 and apply them to the remaining cells. Alternatively, you can click A5:A13 and apply steps 2 and 3 all at once.
- The alphabets in the texts in column A will now appear stacked vertically from top to bottom.
- If you want to use the Rotate up format, you can follow steps 1 and 2 to the cells that you want to appear vertical. In step 3, click the Rotate up option instead.

- And lastly, if you want to use the Rotate down format, follow steps 1 and 2. Then, click the Rotate down option.

That’s pretty much it. You can now make text vertical in Google Sheets together with the other numerous Google Sheets formulas to create even more powerful formulas that can make your life much easier.


